Setting up a dedicated server: Difference between revisions
| Line 674: | Line 674: | ||
</pre> | </pre> | ||
<nowiki><hr></nowiki> | |||
=== Automated RCON === | |||
here are some examples of scripts that interact with Pavlov RCON | |||
'''<big>Inspect players every 5 minutes</big>''' [https://github.com/JTWP-org/inspect-every-5-mins/blob/main/log/inspectPlayer-04-23-2023-21-50.demo.json (installation instructions on GITHUB )] | |||
This [https://www.gnu.org/software/bash/ BASH] script will collect current players stats for every one. then it will write them to a log in JSON format that can easily be handled for your records or the next project .. | |||
"PlayerName": "Salted Cracker Jack", | <sup>below is all the info that will be collected every 5</sup> | ||
"PlayerName": "Salted Cracker Jack", | |||
"UniqueId": "76561198210003277", | "UniqueId": "76561198210003277", | ||
{| class="wikitable" | |||
|+ | |||
|PLAYERS NAME | |||
|Salted Cracker Jack | |||
|- | |||
| | |||
| | |||
|- | |||
| | |||
| | |||
|} | |||
"KDA": "27/0/18", | "KDA": "27/0/18", | ||
| Line 700: | Line 714: | ||
"TeamId": "1" | "TeamId": "1" | ||
=== Pending Restart === | |||
when this [https://www.gnu.org/software/bash/ BASH] script is triggered it will start a loop that checks every 15 mins if the server is empty and | |||
---- | ---- | ||
Revision as of 22:33, 25 May 2023
Setting up a dedicated server
There are no Windows binaries
This guide is written exclusively for Linux and covers Ubuntu/Debian/Debian-like and Red Hat RPM-based distros. Possible to run with other distros, but some of the commands won't work and you will need to know enough to figure out the software install of dependencies on your own.
If you are considering hosting from home, please read that section of the wiki first.
This guide assumes you know the basics of using a bash terminal: ssh'ing into a server, running bash commands, editing text files, etc.
If you have no experience using bash, maybe start here. Editing text files via commandline is often a challenge. Suggest using nano and reading guide here
If you are new to linux and accessing your server from Windows, highly suggest using MobaXterm as your SSH client as that can make required editing of text files easier using built in editor instead of the native linux command line editors.
And finally, ask yourself why you want to setup a server? If you look at the list, there are many, many more servers than players. If you don't have a team, discord community, or group of friends ready to play on your server, chances are it will go unused. Got one of these... great, let's go.
If you don't want to go through the hassle yourself and want to pay for a hosting service Arctic VR (PC and Shack) and Horde (Shack) provide a server hosting services and are trusted in the community. See links below.
Server Requirements
Pavlovserver can only be hosted under Linux.
This can be running as a VM under windows, but this will increase the complexity of the setup beyond this guide.
Ubuntu 18.04 x86_64, Ubuntu 19/04 amd64, Ubuntu 20.04, and Rocky Linux 8 are confirmed working. Ubuntu 15.04 x86 is known to fail to install using this guide. Recommend not running on "minimal" images as some tools are missing.
- 2GB RAM + 1GB RAM per each additional server with 10 players. More RAM is recommended for larger maps, higher player counts, or complex gamemodes. Not having enough RAM is a common cause of server crashes.
- A ~2.5Ghz CPU will comfortably support a 10 player server.
- A ~4Ghz CPU will comfortably support 24 players. This is a limit built into Pavlov itself, no server will allow players to join over 24. Lower player counts are recommended for complex gamemodes (E.g. CodZ) and/or highly detailed maps, so that maximum number will often be lower.
(Note that these are not hard limits for player counts, just suggestions for the best performance, based on experiences with many server providers on different grades of hardware.)
- Pavlovserver is functionally single threaded (one thread does vast majority of work). More CPUs only help if you are running more servers. More clockspeed = higher performance = more users per server.
The maximum number of servers you can run is dependent on how many CPUs you have. For example, if you have an 8 core CPU, the maximum number of servers would be 7. You should always have at least one CPU free as overhead, as Pavlov servers can use slightly more than one thread.
Hosting at home
When hosting at home there are additional requirements regarding networking: Your router has to support port-forwarding, hair-pinning/LoopbackNAT, and respond to ping requests. These techniques are necessary to allow your server to be found and to talk back to the client. please see https://en.wikipedia.org/wiki/Port_forwarding, https://en.wikipedia.org/wiki/Hairpinning, and https://www.speedguide.net/faq/how-to-become-pingable-behind-a-routerfirewall-376 for more info and google for these terms in addition to your router model to find guides on how to enable/configure it properly. If you have modern Router, it may have these features already enabled, in this case you just have to configure port-forwarding. If you can see your server but not join it while others can, this is indicative of a failure of LoopbackNAT.
A second challenge to hosting at home is CGNAT (Carrier grade NAT: https://www.a10networks.com/blog/carrier-grade-nat/). Just like NAT on your home network that has to be gotten around w/ port-forwarding, CGNAT breaks the ability of external connections to be made back to your server, but the controls are solely in your ISPs hands. Sometimes if you ask, you can be removed from CGNAT pools and/or assigned a static IP. CGNAT rollouts are becoming very common now, so if your server worked then doesn't allow connections now, your ISP may have made this change.
You can check whether you’re on a CGNAT network by visiting a Web site such as ipaddress.com or whatsmyip.com and comparing the IP address listed to the public/WAN IP address assigned to your Internet gateway. To find your gateway’s public IP address, check the status page in the administrative interface. If the two IP addresses differ, you’re likely on a CGNAT network. If so, this problem must be resolved before you go any further.
Not understanding these requirements and configuration is a frequent cause of failed setups and questions in discord. Don't skip this if you are trying to host from home
There are serious security implications of hosting this software at home. None of the devs are security experts and there has been no security review of the code. You are opening up your system to the world and publicity advertising this fact. Expect that any system hosting this software is open to compromise from the Internet and act accordingly. If your router offers a DMZ network, use it. Consider hosting on a cloud based server and think twice before running this software on any system that contains data you care about or has access to networks and computers you care about.
If you're hosting at home using Oracle's VirtualBox, there are steps you can take to prevent double NAT (which can cause issues later on)
1. Select your VM and then click Settings in VirtualBox's main window.
2. Click on Network and change Attached To from NAT to Bridged Adapter.
Once you've done this, your VM should be connected directly to your home router and double NAT should no longer be a issue.
Hosting Providers
Considering the suggested server specs, you may be interested in the following hosting providers. For providers promising dedicated "Pavlov hosting" as opposed to general VPS services please contact and ask how you change maps being hosted and how you get RCON access before you put your money down.
Provider              | Base CPU | Details
Arctic VR             | 4.5 GHz  | https://www.arctic-vr.com/server-hosting
Amazon Web Services   | 4.0 GHz  | https://aws.amazon.com/ec2/instance-types/z1d/
VULTR                 | 4.0 GHz  | https://www.vultr.com/products/high-frequency-compute/
packet.com            | 3.5 GHz  | https://www.packet.com/cloud/servers/c1-small/
Google Cloud Platform | 3.2 GHz  | https://cloud.google.com/compute/docs/cpu-platforms
ARCTIC VR
Arctic VR is the largest and longest running Pavlov VR hosting provider. The In-Game Admin Menu is exclusive to the ArcticVR hosting service. They offer EU, NA East and NA West servers for both shack and PCVR. ArcticVR offers the fastest Pavlov servers as well as DDos Protection, RCON remote management, custom maps, low pings, unlimited slots, and expert support.
Website: https://www.arctic-vr.com/server-hosting

VULTR
Consider using a referral from the community:
Carlos: https://www.vultr.com/?ref=8615589-6G
Carrot: https://www.vultr.com/?ref=8689348
Archaeo: https://www.vultr.com/?ref=8653652-6G
Cheeto: https://www.vultr.com/?ref=8717358
For a Pavlov Shack server, I recommend minimum Cloud Compute, Intel High Performance, Ubuntu 20.04, and disabled automatic backups. At the time, this was $6/m. Some of the cheap options have 1TB bandwidth, and some have 2TB+. If it's a personal server, 1TB could be fine, but 2TB should be safe.
Google Cloud Platform (90 day free credit available)
The below configuration is successfully running 4 pavlov PC instances with ~15 total maps and up to 24 players per server. If you want more maps use larger boot disk. Both can dynamically be scaled based on popularity.
Menu -> compute engine -> VM instances
create instance
- region: wherever you like
- machine type: n1-highcpu-4 (4 vCPUs, 3.6 GB memory)
- boot disk: Ubuntu 20.04
- boot disk -> size: 25gb
- network tags: pavlov-server
- [create]


Menu -> Vpc network -> firewall rules
[Create firewall rule]
Name: pavlov server
Target Tags: pavlov-server
Source IP Ranges: 0.0.0.0/0
Protocols and Ports -> Specified protocols and ports -> UDP: 7777, 8177 (Shack and PC)
Protocols and Ports -> Specified protocols and ports -> TCP: 7777, 8177 (Shack-only)
Protocols and Ports -> Specified protocols and ports -> TCP: {RCON port - default 9100}
[save]
Amazon Web Services (30 day free credit available)
Login -> Change Region: Choose your region
Services -> Compute -> EC2 -> Create
Choose an AMI: Ubuntu 18.04
Instance Type: z1d.large

Instance Details -> Tenancy: Dedicated (optional: this will more than triple the cost)

Storage: 50gb disk (or whatever, you're in control of the map roster)

Security Groups:
Create a new Security Group
Security group name: pavlov-server
Description: pavlov server
Rules:
Type: Custom ICMP Rule - IPV4 / Protocol: Echo Request
Type: Custom UDP Rule / Port Range: 7777 / Source: 0.0.0.0/0
Type: Custom UDP Rule / Port Range: 8177 / Source: 0.0.0.0/0
Type: SSH (optional, but I assume you wanna SSH in..)

Launch -> Create new Keypair -> Download -> Launch

Once it's started, SSH in like:
$ ssh -i your-key.pem ubuntu@you-server-details.amazonaws.com

(I use cmder on Windows, if you're using putty or mobaxterm or something, might be different)
Starting Server Install
Obtaining an ApiKey
For your server to show up in the server list, there is now a requirement to have an ApiKey issued by vankrupt. This is to prevent DOS attacks against the master server
Get the key by going here: https://pavlov-ms.vankrupt.com/servers/v1/key and using your mobile number to get a SMS (note that there have been reported failures of this SMS system for non-US mobiles. In this case DM davevillz your mobile and ask for a key)
Put this key in your Game.ini as follows:
ApiKey="ABC123FALSEKEYDONTUSEME"
or if you would like (personally untested..I would use game.ini) you can call it at server runtime with flag as follows:
-KEY="ABC123FALSEKEYDONTUSEME"
This key can be re-used for a reasonable number of servers (a limit of 10 has been mentioned). Contact the Devs if you need more servers per key.
System setup and software installation
Install dependencies and create the `steam` user. (You only need to do this once):
Confirm Linux version
lsb_release -a
Ubuntu 20.04
sudo apt update && sudo apt install -y gdb curl lib32gcc1 libc++-dev unzip
sudo useradd -m steam
Ubuntu 20.10 or higher
sudo apt update && sudo apt install -y gdb curl lib32gcc-s1 libc++-dev unzip
sudo useradd -m steam
Rocky Linux, CentOS 8, and RHEL 8
sudo sed -i 's/^SELINUX=enforcing$/SELINUX=permissive/g' /etc/selinux/config
sudo setenforce 0
sudo yum install gdb curl glibc.i686 libstdc++.i686 libstdc++-devel.i686 libstdc++-devel.x86_64 unzip wget -y
wget https://download-ib01.fedoraproject.org/pub/epel/7/x86_64/Packages/l/libcxx-3.8.0-3.el7.x86_64.rpm
sudo rpm -i libcxx-3.8.0-3.el7.x86_64.rpm
sudo useradd -m steam
[Optional] Set a password for steam.
sudo passwd steam
Login as the steam user. (You will need to do this each time you connect to your server):
sudo su -l steam
Install Steam:
mkdir ~/Steam && cd ~/Steam && curl -sqL "https://steamcdn-a.akamaihd.net/client/installer/steamcmd_linux.tar.gz" | tar zxvf -
There are different dedicated server versions for Pavlov Server - choose which server version you want to host (PC non-beta, PC Beta, Shack Live, or Shack RC)
(You will need to run this command each time there is a Pavlov Server update).
To host PC Server (non-beta):
~/Steam/steamcmd.sh +force_install_dir /home/steam/pavlovserver +login anonymous +app_update 622970 +exit
To host PC BETA:
~/Steam/steamcmd.sh +force_install_dir /home/steam/pavlovserver +login anonymous +app_update 622970 -beta beta_server +exit
To host Shack Live (Quest):
~/Steam/steamcmd.sh +force_install_dir /home/steam/pavlovserver +login anonymous +app_update 622970 -beta shack +exit
To host Shack RC (Quest):
~/Steam/steamcmd.sh +force_install_dir /home/steam/pavlovserver +login anonymous +app_update 622970 -beta shack_beta +exit
Now that we've installed the server, all pavlov server versions should continue.
Install a fresh copy of steamclient.so (May have to do this after each update):
~/Steam/steamcmd.sh +login anonymous +app_update 1007 +quit
mkdir -p ~/.steam/sdk64
cp ~/Steam/steamapps/common/Steamworks\ SDK\ Redist/linux64/steamclient.so ~/.steam/sdk64/steamclient.so
cp ~/Steam/steamapps/common/Steamworks\ SDK\ Redist/linux64/steamclient.so ~/pavlovserver/Pavlov/Binaries/Linux/steamclient.so
Make the PavlovServer script executable. (You only need to do this once):
chmod +x ~/pavlovserver/PavlovServer.sh
Server Configuration
Before starting the server we need to configure it. Start by creating some directories:
mkdir -p /home/steam/pavlovserver/Pavlov/Saved/Logs
mkdir -p /home/steam/pavlovserver/Pavlov/Saved/Config/LinuxServer
mkdir -p /home/steam/pavlovserver/Pavlov/Saved/maps
Mods/Blacklist/Whitelist (optional)
The following three files allow you to specify mods, banned players, and whitelist players. These are optional, but go ahead and create them. Populating the files is described later.
touch /home/steam/pavlovserver/Pavlov/Saved/Config/mods.txt
touch /home/steam/pavlovserver/Pavlov/Saved/Config/blacklist.txt
touch /home/steam/pavlovserver/Pavlov/Saved/Config/whitelist.txt
Configuring Game.ini
Create a new Game.ini file using following command to open an editor and copy/paste the following block into it then save it. Note not all of these options are required. For instance remove or comment out the Password=0000 line to make a public server with no pin.
nano /home/steam/pavlovserver/Pavlov/Saved/Config/LinuxServer/Game.ini
[/Script/Pavlov.DedicatedServer]
bEnabled=true
ServerName="My_private_idaho"
MaxPlayers=10     #Set this to 10 for Shack. 24 is the max for PC, setting it higher will not allow players to join.
ApiKey="ABC123FALSEKEYDONTUSEME"
bSecured=true
bCustomServer=true
bVerboseLogging=false
bCompetitive=false #This only works for SND
bWhitelist=false
RefreshListTime=120
LimitedAmmoType=0
TickRate=90
TimeLimit=60
#Password=0000
#BalanceTableURL="vankruptgames/BalancingTable/main"
MapRotation=(MapId="UGC1758245796", GameMode="GUN")
MapRotation=(MapId="datacenter", GameMode="SND")
MapRotation=(MapId="sand", GameMode="DM")
- bEnabled - whether the server appears in the server list (unconfirmed)
- ServerName - name it will be listed as. (approx 35 chars max)
- MaxPlayers - See suggested specs for limits. 10 standard (10 for shack), 20-24 is max recommended for large maps like Stalingrad or PUSH/RUSH modes, and servers allow a maximum of 24 players.
- ApiKey - Unique ApiKey required to register server with master server. Replace with your key
- bSecured - enabled Valve Anti-Cheat (VAC)
- bCustomServer - activates some new modding tools (save and http functions. Required to write to blacklist.txt for bans)
- bCompetitive - sets the server to competitive mode for SND. If removed the server will default to false
- bVerboseLogging - enables verbose logging, mostly detailed statistics. Be prepared for significant increase in logging.
- bWhitelist - Only allow users in whitelist.txt to join
- RefreshListTime - sets how often the running server checks for updates in ban/whitelist/mod files
- LimitedAmmoType - sets limited ammo mode
0 = Unlimited 1 = Limited Generic 2 = Limited Specific 3 = Custom (for modders) 4 = Limited Special 5 = Boxless Mode
- TimeLimit - sets time limit for each map
- TickRate - sets the server tickrate. (so far minimum stable seems around 50 and max around 120. Beware setting this changes weapon despawn time and breaks some game modes. Recommend not touching)
- Password - PIN number for server #FYI - this is now also changeable via rcon.
- BalanceTableURL - Points to a custom balance table from github. See https://github.com/vankruptgames/BalancingTable for instructions. This line isn't needed if you don't have one.
- MapRotation - you can add multiple of these. The MapId must be “UGC” followed by the map ID. you can find the map id in the URL of the steam workshop page. When a match ends, the server will load the next map in the rotation. You can also use RCON to switch to a map not included in rotation.
Available game modes as of 09/06/2022: SND, TDM, DM, GUN, ZWV, WW2GUN, TANKTDM, KOTH, TTT, OITC, INFECTION, HIDE, PUSH, PH
And for Shack only: CTF
For maps running a Custom gamemode (CodZ, BR, Duel, etc.) it doesn't matter which gamemode you choose, as the map will automatically override it with the custom mode.
UGC###### are for custom maps from Steam workshop (PC Only). Find the map you want in the workshop. This is the URL for Mirage (https://steamcommunity.com/sharedfiles/filedetails/?id=2670152485). The 10 numbers at the end of the URL are what you need, so UGC1661803933 would be the MapId for Mirage.
Firewall/Port forwarding
Using the default settings there are two UDP ports (7777, 8177) that need to be allowed to access the server either by firewall setup or port forwarding.
Ubuntu firewall commands to check firewall and open ports:
sudo ufw status
sudo ufw allow 7777
sudo ufw allow 8177
sudo ufw allow 9100
sudo ufw status
Rocky Linux firewall commands to check firewall and open ports:
sudo firewall-cmd --zone=public --add-port=7777/tcp
sudo firewall-cmd --zone=public --add-port=7777/udp
sudo firewall-cmd --zone=public --add-port=8177/tcp
sudo firewall-cmd --zone=public --add-port=8177/udp
sudo firewall-cmd --zone=public --add-port=9100/udp
sudo firewall-cmd --zone=public --add-port=9100/tcp
sudo firewall-cmd --list-ports
firewall-cmd --runtime-to-permanent
You may also need to allow Pings (ICMP) for the server's true latency to appear in the master list.
If you are running multiple servers and have set additional ports (see http://wiki.pavlov-vr.com/index.php?title=Dedicated_server#Running_multiple_servers_on_one_host) then you need to allow access to the defined port plus the port 400 higher. So if you use 7000 as your port, then UDP 7000 and 7400 need to be open
If you have setup rcon via RconSettings.txt (below) then that port also need to be allowed access via TCP
If you are running Shack/Quest and want to have maps that are downloadable from your server, your server ports (ex. 7777 & 8177) must also be open via TCP
Shack Maps (Quest)
If you try to use the steps above to add maps for Shack, youll run into issues very quickly. This is because Shack has no affiliation to Steam, and therefore cannot use Steam Workshop maps like above. In the future, these steps will apply to PC servers as well, allowing a server to hold the map itself, instead of offloading to Steam.
To get started, first create the directory to hold the maps
mkdir -p /home/steam/pavlovserver/Pavlov/Saved/maps
You can use any number of methods to move the map files onto the server, but ill go over the two simplest, starting with a GUI approach
Download and install CyberDuck onto your "home" PC (Whatever PC you use for access to the server, but not the server itsself): https://cyberduck.io/
Next, download and unzip your map of choice from https://www.pavlovquest.com/ , https://pavlovhorde.com/mapsList, or look in #shack-map-showcase channel in the discord server. I'm going to use Cheeto's WW2 Items test (http://www.mediafire.com/file/emyt9bs1z9u9ykw/SVR_Cheeto_Items.zip/file ) for this example, you do what you like
In the top left corner, open a connection, set the connection type to SFTP, and fill in the rest of the information. User will be root, password is whatever you set the root pw as (toor in Ubuntu by default)
In the directory dropdown (itll say /root) go back to /
Follow the directories until we arrive back at our "maps" folder
/home/steam/pavlovserver/Pavlov/Saved/maps
Drag and drop the unzipped map folder into the main window, in this case itll be SVR_Cheeto_Items
Hit Allow
Youll now see a folder named SVR_Cheeto_Items, and within it should be nothing but 3 files. If there is another folder in it, move this folder to the maps directory, otherwise the server wont work. The 3 files (2 .PAK one .JSON) should be in home/steam/pavlovserver/Pavlov/Saved/maps/SVR_Cheeto_Items, no more, no less.
Pavlov Shack servers load maps at pavlovserver start. YOU MUST RESTART THE GAME SERVER TO USE THE MAPS.
To play the map, you can either use RCON switch map command, or to add the map to your servers automatic map rotation list, add the map's folder name to your Game.ini. This replaces the MapID section, so for our example it would be
MapRotation=(MapId="SVR_Cheeto_Items", GameMode="TDM")
And thats all! Disconnect CyberDuck from your server before playing, otherwise youll have difficulty joining.
Adding Shack Maps over Command Line Interface
Pavlov Shack servers load maps at pavlovserver start. YOU MUST RESTART THE GAME SERVER TO USE THE MAPS.
A bit more complicated, but adding maps over CLI has its benefits
First, CD to the maps directory you made above
cd ~/pavlovserver/Pavlov/Saved/maps
Download the map files from whatever you use to upload them. To do this, you can either use curl or wget
curl -O insertURLhere
If you download your map from Google Drive, make sure that your .zip folder is shared to anyone.
Then, get the file's url from the shared link.
Example : https://drive.google.com/file/d/19bI8gUHaN5tUrDvnadAacUnchQf6_k/view
will be 19bI8gUHaN5tUrDvnadAacUnchQf6_k
Edit "fileId" and "fileName" before you execute the command.
fileId=19bI8gUHaN5tUrDvnadAacUnchQf6_k
fileName=SVR_USER_MAPNAME
curl -sc /tmp/cookie "https://drive.google.com/uc?export=download&id=${fileId}" > /dev/null
code="$(awk '/_warning_/ {print $NF}' /tmp/cookie)"
curl -Lb /tmp/cookie "https://drive.google.com/uc?export=download&confirm=${code}&id=${fileId}" -o ${fileName}
To keep with the Items example:
curl -O https://cdn.discordapp.com/attachments/744185280759857234/745027406695366788/SVR_Cheeto_Items.zip
Next, unzip the file. If this next step errors out, saying the command is unknown, switch back to the root user (su root), and install unzip (sudo apt install unzip), then return to the steam user, and continue.
unzip SVR_Cheeto_Items.zip
Now finish like before by adding the map to your Game.ini
nano /home/steam/pavlovserver/Pavlov/Saved/Config/LinuxServer/Game.ini
MapRotation=(MapId="SVR_Cheeto_Items", GameMode="TDM")
Admin/Moderator list (optional)
The only working in-game admin menu is through Arctic VR server hosting (see below).
If you add moderators to your server, they will not be subject to vote kicks.
nano ~/pavlovserver/Pavlov/Saved/Config/mods.txt
Example Mod List:
76541198397498572 #Optional Comment: Player name
76541198397498573 #Some Other Player
ArcticVR Admin Menu
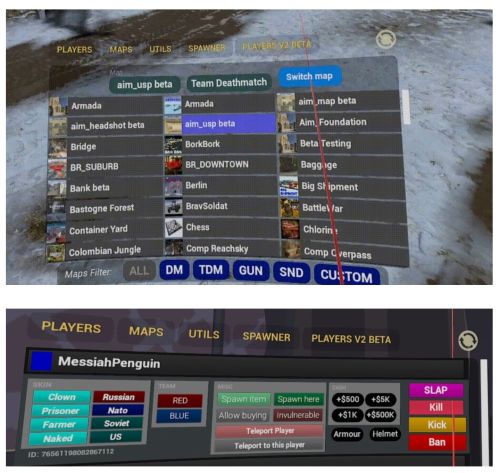
Arctic-VR Offers an advanced In-Game Admin menu that is exclusive to their hosting service. Features include:
- Switch Maps+Modes
- Teleport Players to Players
- Change Player Skins
- Control Player Buying+Cash
- Spawn Items
- Clean up corpses + guns
- Spawn Bots
- Spawn Items for other players
- Control Teams + Balance/Shuffle Teams
- ResetSND
- And More
You can read more about the ArcticVR admin menu on their website: https://www.arctic-vr.com/server-admin-menu
Handy tools for finding steamIDs
Steam ID finder: https://steamidfinder.com/lookup/ or https://steamid.xyz/
You want to enter in the steamID64 format.
This tool can convert or lookup IDs: https://steamid.io/
If you are looking for a steamID of a player that has been on your server recently this is technique to find them:
grep -i playername ~/pavlovserver/Pavlov/Saved/Logs/* | grep TicketValidation
Configure Rcon
To enable Rcon access create config file:
nano /home/steam/pavlovserver/Pavlov/Saved/Config/RconSettings.txt
Copy in the following text - change password, and if desired the port:
Password=ChangeThisPassword
Port=9100
You must specify a port for the Rcon server to use as well as a Password (use a different port per sever instance if running multiple server instances off the same hardware)
Starting the server
cd ~/pavlovserver && ./PavlovServer.sh
That's it, your server will be automatically broadcast to the master server! :)
Two handy tools to determine quickly if your server is broadcasting are Pablub (PC only) and Horde (Shack) and Horde (PC version)
Note that when you close your terminal, the server will go down. See the "supervisors" section below for how to prevent this.
Auto-updating the server
Assuming you have followed this guide and used the default paths, users, and install instructions, you can paste the following into your terminal to auto-update your Pavlov server:
cat << 'EOF' > $HOME/pavlov_daily_update_and_restart.sh
#!/bin/bash

USER="steam"
SERVICENAME="pavlovserver.service"
INSTALLDIRNAME="pavlovserver"
USERHOME="/home/$USER"

echo -e "Beginning Pavlov VR update run on $(date)\n\n"

systemctl stop "$SERVICENAME"

sleep 5
sudo -iu "$USER" "$USERHOME/Steam/steamcmd.sh" +login anonymous +force_install_dir "$USERHOME/$INSTALLDIRNAME" +app_update 622970 +exit
sudo -iu "$USER" "$USERHOME/Steam/steamcmd.sh" +login anonymous +app_update 1007 +quit
sudo -iu "$USER" cp "$USERHOME/Steam/steamapps/common/Steamworks SDK Redist/linux64/steamclient.so" "$USERHOME/.steam/sdk64/steamclient.so"
sudo -iu "$USER" cp "$USERHOME/Steam/steamapps/common/Steamworks SDK Redist/linux64/steamclient.so" "$USERHOME/pavlovserver/Pavlov/Binaries/Linux/steamclient.so"

systemctl start "$SERVICENAME"

echo -e "Ending Pavlov VR update run on $(date)\n\n"

EOF

chmod +x $HOME/pavlov_daily_update_and_restart.sh
mkdir $HOME/pavlov_update_logs && touch $HOME/pavlov_update_logs/pavlov_daily_update_and_restart.sh.log
CRONLINE="00 2 * * * $HOME/pavlov_daily_update_and_restart.sh >>$HOME/pavlov_update_logs/pavlov_daily_update_and_restart.sh.log 2>&1"
(sudo crontab -u root -l; echo "$CRONLINE" ) | sudo crontab -u root -
unset CRONLINE
These commands will:
1. Create a shell script in the "steam" user's home directory that automatically stops the Pavlov server, pulls any updates via steam, pull updates to the Steamworks SDK Redist, and copies the latest version of steamclient.so to the Pavlov server directory
2. Make the shell script executable
3. Create a new directory called "pavlov_update_logs" in the "steam" user's directory, and create a logfile inside that directory called "pavlov_daily_update_and_restart.sh.log". You can check this logfile to see the output of the Pavlov and Steam SDK update commands.
4. Create a crontab entry for the root user that runs this shell script automatically every day at 2:00AM local time
If you want to change the time that this script runs, edit the numbers "00 2" in the line that starts with "CRONLINE=". In the example provided, 00 is the minutes column, and 2 is the hour column. For example, if you wanted the server to automatically update and restart at 4:17AM every day, change the line starting with "CRONLINE=" to:
CRONLINE="17 4 * * * $HOME/pavlov_daily_update_and_restart.sh >>$HOME/pavlov_update_logs/pavlov_daily_update_and_restart.sh.log 2>&1"
If the time is PM, use 24-hour time format, e.g. "32 18" for 6:32PM.
Supervising the server using systemd
Running ./PavlovServer.sh in your interactive shell is easy, but the server will shut down when you close your terminal. If you want to run the server in the background, you'll want to run it under a supervisor. There are many options, ranging from the simple (nohup, screen or tmux), to the more robust (supervisord, systemd).
Systemd is running by default on Ubuntu Linux, so we'll use that here.
To run the server as a systemd service, create the file /etc/systemd/system/pavlovserver.service (as root) by typing
sudo nano /etc/systemd/system/pavlovserver.service
Copy contents below into the file and save.
[Unit]
Description=Pavlov VR dedicated server

[Service]
Type=simple
WorkingDirectory=/home/steam/pavlovserver
ExecStart=/home/steam/pavlovserver/PavlovServer.sh

RestartSec=1
Restart=always
User=steam
Group=steam

[Install]
WantedBy = multi-user.target
If you'd like your server to start as competitive without editing the game.ini, change the line "ExecStart=/home/steam/pavlovserver/PavlovServer.sh" to look like this below. Though it's much easier to just use the game.ini to enable competitive instead.
ExecStart=/home/steam/pavlovserver/PavlovServer.sh -COMPETITIVE=1
Change the user or paths as appropriate. After saving the service file, to start, restart, stop, or monitor the server:
sudo systemctl start pavlovserver
sudo systemctl restart pavlovserver
sudo systemctl stop pavlovserver
sudo systemctl status pavlovserver
To view the logs:
sudo journalctl -u pavlovserver
# to live-tail the logs
sudo journalctl -u pavlovserver -f
If you want to run the pavlov server as soon as your server boots (e.g. a VPS you turn on and off), add pavlov as a startup service:
sudo systemctl enable pavlovserver
Advanced Server Administration
Running multiple servers on one host
- Pavlovserver is functionally single threaded (there are multiple threads, but vast majority of work occurs in the primary one). Make sure you have # of pavlovservers + 1 CPU available. More CPUs= more servers. Faster CPU = more players.
- Make multiple server installs by defining a separate install dir for each server.
- Run each server with a unique port. eg: ./PavlovServer.sh -PORT="Desired Port"
- The Server will use the Desired Port and the Port 400 above (Example: You choose 8200 as Port. So Port 8600 will be used as well)
- If you are using RCON, each server will need a unique port defined in RconSettings.txt
- Ensure the ports are forwarded and opened in your firewall
To duplicate directories:
be in the steam home folder
cp -r pavlovserver pavlovserver1
/home/steam/pavlovserver1/PavlovServer.sh -PORT=[Desired Port]
Starting server in competitive mode
Competitive mode will prevent dead teammates from being able to see the match, to prevent ghosting. You can either enable this via Game.ini (described in Game.ini file), or using the -COMPETITIVE=1 parameter.
/home/steam/pavlovserver1/PavlovServer.sh -COMPETITIVE=1
<hr>
Automated RCON
here are some examples of scripts that interact with Pavlov RCON
Inspect players every 5 minutes (installation instructions on GITHUB )
This BASH script will collect current players stats for every one. then it will write them to a log in JSON format that can easily be handled for your records or the next project ..
below is all the info that will be collected every 5
"PlayerName": "Salted Cracker Jack",
"UniqueId": "76561198210003277",
| PLAYERS NAME | Salted Cracker Jack |
"KDA": "27/0/18",
"Score": "72",
"Dead": false,
"Cash": "13000",
"TeamId": "1"
Pending Restart
when this BASH script is triggered it will start a loop that checks every 15 mins if the server is empty and
Useful Linux Commands
List files / folders in directory, print current working directory,
ls -la                                    #list files/directories along with authorities and ownership
pwd                                       #print working directory
sudo chown <owner> <file/directory>       #change owner of file/directory.  If root created something and you need to change it to steam
sudo chgrp <group> <file/directory>       #change group of file/directory.
Check if pavlov is running by checking process status. If the only row you see is the grep command, pavlov server is not started.
ps -ef | grep pav
Sample output:
steam      34044       1  0 16:52 ?        00:00:00 /bin/sh /home/steam/pavlovserver/PavlovServer.sh
steam      34066   34044 80 16:52 ?        00:00:04 /home/steam/pavlovserver/Pavlov/Binaries/Linux/PavlovServer
zombies+   34101   34013  0 16:52 pts/0    00:00:00 grep --color=auto pav
Kill a process. Note this command uses 34044, which is a process id from the command output above.
kill -9 34044
Dump the log to the console so you can scroll through it:
cat /home/steam/pavlovserver/Pavlov/Saved/Logs/Pavlov.log
Search the log for a string - replace my_string with case-sensitive string
cat /home/steam/pavlovserver/Pavlov/Saved/Logs/Pavlov.log | grep my_string
Default Map ID's
datacenter
sand
bridge
containeryard
siberia (Prison Break)
hospital (Zombies map)
killhouse
range
tutorial
santorini
station
industry
ogcontainers (Shack only)
haguenau (Shack only)
foundation (Shack only)
stalingrad (PC only)
stalingrad_night (PC only)
santorini_night (PC only)
sand_night (PC only)
station_night (PC only)
industry_night (PC only)
bunker (PC only)
Automated server log backup
here is how to setup a bash script to 1x a day compress all log files and save them to protect from auto deletion it will also post a discord webhook to confirm its working and saved the days logs
https://github.com/JTWP-org/backUpLogs
Troubleshooting
To run the server without outputting the heartbeat:
./PavlovServer.sh | sed '/heartbeat/d'
To monitor the logs (without heartbeat) from another terminal:
tail -f -n10000 /home/steam/pavlovserver/Pavlov/Saved/Logs/Pavlov.log | grep -v 'Sending heartbeat to masterserver'
Check your CPU Clock Speed with:
lscpu | grep MHz
Server won't start
Error message:
ln: failed to create hard link '/home/steam/.steam/sdk64/steamclient.so': File exists
ln: failed to create hard link '/home/steam/pavlovserver/Pavlov/Binaries/Linux/steamclient.so': File exists
/home/steam/pavlovserver/Pavlov/Binaries/Linux/PavlovServer: error while loading shared libraries: libc++.so.1: cannot open shared object file: No such file or directory
First two errors are harmless. The third one is because libc++ step was skipped or failed. Using sudo capable id (probably not steam id), [re]run this line:
sudo apt update && sudo apt install -y gdb curl lib32gcc1 libc++-dev unzip
Map wont load (kicks to datacenter)
try deleting all the downloaded workshop maps with:
sudo rm -rf /tmp/workshop/7777/content/555160/*
for all maps or
sudo rm -rf /tmp/workshop/7777/content/555160/whatever-UGC
for specific map
Map wont load when running in a container
The three typical container problems I have seen:
1) Steam can't write to /tmp for some reason
2) /tmp is actually tmpfs instead of real filesystem and a few gigs of maps runs you out of RAM
3) Made worse by fact that pavlovserver unpacks downloads to ram, then writes to /tmp/workshop. Not enough RAM to do this, no map for you.
Server stuck rotating forever
Run these 2 commands, then restart your server:
cd ~/Steam && ./steamcmd.sh +login anonymous +app_update 1007 +quit
cp ~/Steam/steamapps/common/Steamworks\ SDK\ Redist/linux64/steamclient.so ~/.steam/sdk64/steamclient.so
If this doesn't fix it, double check that your server isn't running on the same port as another, by running this command:
ps -ef | grep pav
Then if 2 servers are on the same port, you can fix it by editing the pavlovserver.service file, and making sure the following line:
ExecStart=/home/steam/pavlovserver/PavlovServer.sh -PORT=Number
has a unique number after the port for each server you're running.
Server - ping 999
Google Cloud Platform - Make sure your compute engine has a network tag and your network rules are applied to the tag. Make sure you opened the specified ports.
Network testing tools: Test if your server will respond to ping from outside your network: https://www.wormly.com/test-remote-ping
Test if your ports are accessible via UDP (7777,8177,9100): https://www.ipvoid.com/udp-port-scan/
Can't connect to RCON
Check the file and group owner of RconSettings file. It should be steam, or the ID used to run the pavlov server.
cd /home/steam/pavlovserver/Pavlov/Saved/Config
ls -la
If the owner/group are not steam, using root or an id with sudo authority, change them to steam, confirm they are now set properly, then restart the pavlov server. (Note - if Rcon has wrong permissions, after fixing you should also to check the other config files like Game.ini, mods/blacklist/whitelist for the same issue. If steam can't access these files, it could cause problems.).
cd /home/steam/pavlovserver/Pavlov/Saved/Config
sudo chown steam RconSettings.txt
sudo chgrp steam RconSettings.txt
ls -la
PC ONLY - Map Download stops
When downloading a large map from the steam workshop make sure your VPS/Dedi or Shared hosting provider (Otherwise known as a GSP's) has enough RAM assigned to store the map files in its tempfs (stored in ram)!
This is less likely to happen on Dedicated servers and VPS with a decent amount of ram unless you are using docker with RAM limits!
Most GSP's will be using docker or some other type of jailing method to limit system resource allocations and direct access to the host machine, if they are and you know what map you want to use make sure you order a service with enough ram to store your map. If in doubt contact your GSP's support team.
Getting Help
There's a #pc-custom-servers channel on the official Pavlov Discord - https://discord.gg/Pavlov-VR. Lots of helpful people there!