User:Rain/Sandbox
TODO: Rename the page to "Dedicated server" because THIS IS NOT A GUIDE!
Hosting
There are no Windows binaries
Server requirements
OS: Linux (Ubuntu 18.04 x86_64, Ubuntu 19/04 amd64, Ubuntu 20.04, and Rocky Linux 8 are confirmed working)
Memory: 2GB RAM + 1GB RAM per each additional server with 10 players. More RAM is recommended for larger maps, higher player counts, or complex game modes.
CPU: A ~2.5Ghz CPU will comfortably support a 10 player server. A ~4Ghz CPU will comfortably support 24 players.
Note: These are not hard limits for requirements, just suggestions for the best performance, based on experiences with many server providers on different grades of hardware.
Pavlov servers are functionally single threaded.
Software dependencies
- gdb (TODO: do you actually need gdb to run a server? wtf?)
- curl (TODO: do you actually need curl to run a server? does pavlov download stuff using curl?)
- lib32gcc1(-s1)
- libc++-dev
SteamCMD
The app ID for Pavlov VR dedicated servers is 622970.
Instructions on how to use SteamCMD are available in the Valve Developer Community Wiki.
To host Shack Live (Quest) use -beta shack, to host Shack RC (Quest) use -beta shack_beta.
Update 29 of the PCVR version of Pavlov VR dedicated servers require you to completely break your system:
sudo rm /usr/lib/x86_64-linux-gnu/libc++.sosudo ln -s /usr/lib/x86_64-linux-gnu/libc++.so.1 /usr/lib/x86_64-linux-gnu/libc++.so
TODO: By all that is good and fair, modifying system files like this for one piece of software is unacceptable. This can be done in a different, less intrusive way.
Configuration
Moderators, Blacklist, Whitelist
The following three files allow you to specify moderators, banned players, and whitelist players.
They are required to be able to use AddMod, Ban, Banlist, ModeratorList, RemoveMod and Unban RCON commands but are otherwise optional.
Pavlov/Saved/Config/mods.txt
Pavlov/Saved/Config/blacklist.txt
Pavlov/Saved/Config/whitelist.txt
TODO: Describe the file contents, give examples.
Game.ini
This file contains the majority of server configuration keys.
It is automatically created when first starting a server, it can also be created manually.
Pavlov/Saved/Config/LinuxServer/Game.ini
Keys
| Key | Allowed values | Default value | Description |
|---|---|---|---|
| bEnabled | TrueFalse
|
True
|
Enables or disables registering with the master server to show or hide the server from the server list
TODO: confirm that this is true, and why is this even a thing, you can't direct connect to servers anyways... |
| ServerName | Any ASCII text value up to 35 characters | DedicatedServer
|
Sets the name with which the server will be listed as
TODO: confirm exact maximum character limit and which characters are allowed (utf8? unicode?) |
| MaxPlayers | Integer
Maximum 10 for Shack, 24 for PC. |
10
|
Sets the amount of available player slots |
| ApiKey | Obsolete, leave empty. | ||
| bSecured | TrueFalse
|
True
|
Enables or disables Valve Anti-Cheat (VAC) |
| bCustomServer | TrueFalse
|
True
|
Enables or disables "some new modding tools". Save and HTTP functions.
Required to write to |
| bCompetitive | TrueFalse
|
False
|
Enables or disables competitive mode for SND |
| bVerboseLogging | TrueFalse
|
False
|
Enables or disables verbose logging.
Verbose logging mostly consists of detailed statistics. This will significantly increase logging. |
| bWhitelist | TrueFalse
|
False
|
Enables or disables usage of the whitelist, allowing only users in whitelist.txt to join
|
| RefreshListTime | Integer, seconds | 10
|
Sets the interval at which the server reads changes from mods.txt, blacklist.txt and whitelist.txt
|
| LimitedAmmoType | Integer, Type ID | 1
|
Sets the limited ammo type, see Limited Ammo Types |
| TimeLimit | Integer, minutes | 60
|
Sets the time limit for each map |
| TickRate | Integer, ticks per second
Recommended between 50 and 120 |
90
|
Sets the rate at which the server processes and updates game state information and network events.
Changes weapon de-spawn time and breaks some game modes. Recommended to leave at default value. TODO: what game modes? breaks how? needs clarification. |
| Password | Integer, 1 to 4 digit pin | 0000
|
Sets the server PIN that is required to be entered before being able to join the server.
Setting the pin to |
| BalanceTableURL | Text formatted as user/repository/branch
|
vankruptgames/BalancingTable/main
|
Sets the balance table Git URL to be used by the server.
See Balancing Table for instructions. |
| AFKTimeLimit | Integer, seconds | 60
|
Sets the maximum amount of time a player can be idle before being automatically kicked.
Setting this to |
| bInitialized | TrueFalse
|
False
|
TODO: What does this do? |
| DepotURL | TODO: What does this do? | ||
| bBroadcast | TrueFalse
|
True
|
Probably enables or disables broadcasting to pavtv?
TODO: What does this do? |
TODO: Verify all default values, right now I'm just guessing
TODO: Sort alphabetically
For maps running a Custom gamemode (CodZ, BR, Duel, etc.) it doesn't matter which gamemode you choose, as the map will automatically override it with the custom mode.
Limited Ammo Types
| AmmoType | Name | Description |
|---|---|---|
| 0 | Unlimited | Players have unlimited ammo, carry no ammo boxes and do not display an ammo count on the wrist. |
| 1 | Limited Generic | Players carry ammo boxes with a limited amount of ammo.
One box for each weapon class (Pistol, Submachine gun, Rifles/MGs, Shotgun, Sniper). Mags and ammo boxes can be put on the chest of the player to consolidate the ammo. An ammo count is displayed on the wrist. |
| 2 | Limited Specific | Players carry ammo boxes with a limited amount of ammo.
One box for each weapon. Mags and ammo boxes can be put on the chest of the player to consolidate the ammo. An ammo count is displayed on the wrist. |
| 3 | Custom | Allows for full control over ammo by the map. |
| 4 | Limited Special | All weapons except "special" weapons are unlimited, more clarification is needed. |
| 5 | Boxless | Like limited generic but without boxes? Clarification is needed. |
Map rotation
The map rotation is defined in the Game.ini.
Upon server start, the first map in the rotation will be started.
When a map has ended, the next map in the rotation will be started.
When the end of the rotation has been reached, it will start from the beginning again.
Each entry requires a separate line of the following format:
MapRotation=(MapId="Name or ID", GameMode="Game Mode")
Name or ID: See Default maps or find the Map ID on Mod.io and append it to "UGC" (Example: https://mod.io/g/pavlov/m/mcdonalds has Resource ID 2804322, the MapID to use would be UGC2804322)
Game Mode: See Game Modes.
| GameMode | Name |
|---|---|
| DM | Death match |
| KOTH | King of the hill |
| GUN | Gun game |
| OITC | One in the chamber |
| SND | Search and destroy |
| TANKTDM | WW2 Team Death Match |
| TDM | Team Death Match |
| TTT | Trouble in Terrorist Town |
| WW2GUN | WW2 gun game |
| ZWV | Zombie wave survival |
| HIDE | The Hidden |
| INFECTION | Hidden infection |
| PUSH | Push |
| PH | Prop hunt |
TODO: move this to game modes page.
Example
[/Script/Pavlov.DedicatedServer]
# This is a comment
bEnabled=True
ServerName=Your server
MaxPlayers=10
bSecured=True
bCustomServer=True
bWhitelist=False
RefreshListTime=120
LimitedAmmoType=0
TickRate=90
TimeLimit=60
Password=1234
bInitialized=False
DepotURL=
ApiKey=
bCompetitive=False
bBroadcast=True
BalanceTableURL=vankruptgames/BalancingTable/Beta_5.1
bVerboseLogging=True
AFKTimeLimit=0

MapRotation=(MapId="datacenter", GameMode="SND")
MapRotation=(MapId="UGC3094680", GameMode="SND")
MapRotation=(MapId="UGC2996823", GameMode="SND")
MapRotation=(MapId="sand", GameMode="SND")
MapRotation=(MapId="UGC2841131", GameMode="SND")
MapRotation=(MapId="UGC2829349", GameMode="SND")
MapRotation=(MapId="container", GameMode="SND")
MapRotation=(MapId="UGC2844898", GameMode="SND")
MapRotation=(MapId="UGC2804502", GameMode="SND")
RCON
The RCON password and port are configured in RconSettings.txt. If the file does not exist or if the values in it are empty, no RCON will be provided.
Pavlov/Saved/Config/RconSettings.txt
Keys
| Key | Allowed values | Default value | Description |
|---|---|---|---|
| Password | Text | changeme
|
Sets the password used to authenticate with RCON |
| Port | Integer, 0-65535 | 9100
|
Sets the port at which RCON will listen |
Example
Password=very secure password
Port=9100
Running
Shack Maps (Quest)
If you try to use the steps above to add maps for Shack, youll run into issues very quickly. This is because Shack has no affiliation to Steam, and therefore cannot use Steam Workshop maps like above. In the future, these steps will apply to PC servers as well, allowing a server to hold the map itself, instead of offloading to Steam.
To get started, first create the directory to hold the maps
mkdir -p /home/steam/pavlovserver/Pavlov/Saved/maps
You can use any number of methods to move the map files onto the server, but ill go over the two simplest, starting with a GUI approach
Download and install CyberDuck onto your "home" PC (Whatever PC you use for access to the server, but not the server itsself): https://cyberduck.io/
Next, download and unzip your map of choice from https://www.pavlovquest.com/ , https://pavlovhorde.com/mapsList, or look in #shack-map-showcase channel in the discord server. I'm going to use Cheeto's WW2 Items test (http://www.mediafire.com/file/emyt9bs1z9u9ykw/SVR_Cheeto_Items.zip/file ) for this example, you do what you like
In the top left corner, open a connection, set the connection type to SFTP, and fill in the rest of the information. User will be root, password is whatever you set the root pw as (toor in Ubuntu by default)
In the directory dropdown (itll say /root) go back to /
Follow the directories until we arrive back at our "maps" folder
/home/steam/pavlovserver/Pavlov/Saved/maps
Drag and drop the unzipped map folder into the main window, in this case itll be SVR_Cheeto_Items
Hit Allow
Youll now see a folder named SVR_Cheeto_Items, and within it should be nothing but 3 files. If there is another folder in it, move this folder to the maps directory, otherwise the server wont work. The 3 files (2 .PAK one .JSON) should be in home/steam/pavlovserver/Pavlov/Saved/maps/SVR_Cheeto_Items, no more, no less.
Pavlov Shack servers load maps at pavlovserver start. YOU MUST RESTART THE GAME SERVER TO USE THE MAPS.
To play the map, you can either use RCON switch map command, or to add the map to your servers automatic map rotation list, add the map's folder name to your Game.ini. This replaces the MapID section, so for our example it would be
MapRotation=(MapId="SVR_Cheeto_Items", GameMode="TDM")
And thats all! Disconnect CyberDuck from your server before playing, otherwise youll have difficulty joining.
Adding Shack Maps over Command Line Interface
Pavlov Shack servers load maps at pavlovserver start. YOU MUST RESTART THE GAME SERVER TO USE THE MAPS.
A bit more complicated, but adding maps over CLI has its benefits
First, CD to the maps directory you made above
cd ~/pavlovserver/Pavlov/Saved/maps
Download the map files from whatever you use to upload them. To do this, you can either use curl or wget
curl -O insertURLhere
If you download your map from Google Drive, make sure that your .zip folder is shared to anyone.
Then, get the file's url from the shared link.
Example : https://drive.google.com/file/d/19bI8gUHaN5tUrDvnadAacUnchQf6_k/view
will be 19bI8gUHaN5tUrDvnadAacUnchQf6_k
Edit "fileId" and "fileName" before you execute the command.
fileId=19bI8gUHaN5tUrDvnadAacUnchQf6_k
fileName=SVR_USER_MAPNAME
curl -sc /tmp/cookie "https://drive.google.com/uc?export=download&id=${fileId}" > /dev/null
code="$(awk '/_warning_/ {print $NF}' /tmp/cookie)"
curl -Lb /tmp/cookie "https://drive.google.com/uc?export=download&confirm=${code}&id=${fileId}" -o ${fileName}
To keep with the Items example:
curl -O https://cdn.discordapp.com/attachments/744185280759857234/745027406695366788/SVR_Cheeto_Items.zip
Next, unzip the file. If this next step errors out, saying the command is unknown, switch back to the root user (su root), and install unzip (sudo apt install unzip), then return to the steam user, and continue.
unzip SVR_Cheeto_Items.zip
Now finish like before by adding the map to your Game.ini
nano /home/steam/pavlovserver/Pavlov/Saved/Config/LinuxServer/Game.ini
MapRotation=(MapId="SVR_Cheeto_Items", GameMode="TDM")
Admin/Moderator list (optional)
The only working in-game admin menu is through Arctic VR server hosting (see below).
If you add moderators to your server, they will not be subject to vote kicks.
nano ~/pavlovserver/Pavlov/Saved/Config/mods.txt
Example Mod List:
76541198397498572 #Optional Comment: Player name
76541198397498573 #Some Other Player
ArcticVR Admin Menu
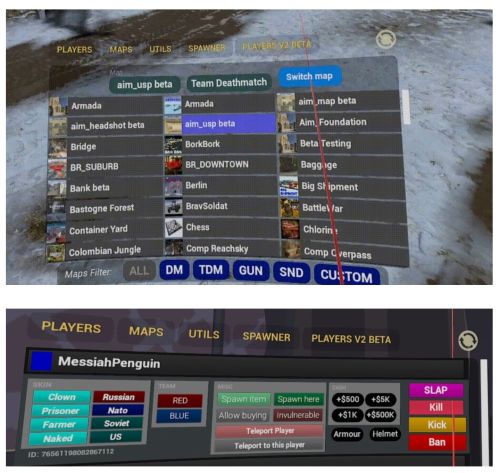
Arctic-VR Offers an advanced In-Game Admin menu that is exclusive to their hosting service. Features include:
- Switch Maps+Modes
- Teleport Players to Players
- Change Player Skins
- Control Player Buying+Cash
- Spawn Items
- Clean up corpses + guns
- Spawn Bots
- Spawn Items for other players
- Control Teams + Balance/Shuffle Teams
- ResetSND
- And More
You can read more about the ArcticVR admin menu on their website: https://www.arctic-vr.com/server-admin-menu
Handy tools for finding steamIDs
Steam ID finder: https://steamidfinder.com/lookup/ or https://steamid.xyz/
You want to enter in the steamID64 format.
This tool can convert or lookup IDs: https://steamid.io/
If you are looking for a steamID of a player that has been on your server recently this is technique to find them:
grep -i playername ~/pavlovserver/Pavlov/Saved/Logs/* | grep TicketValidation
Configure Rcon
To enable Rcon access create config file:
nano /home/steam/pavlovserver/Pavlov/Saved/Config/RconSettings.txt
Copy in the following text - change password, and if desired the port:
Password=ChangeThisPassword
Port=9100
You must specify a port for the Rcon server to use as well as a Password (use a different port per sever instance if running multiple server instances off the same hardware)
Starting the server
cd ~/pavlovserver && ./PavlovServer.sh
That's it, your server will be automatically broadcast to the master server! :)
Two handy tools to determine quickly if your server is broadcasting are Pablub (PC only) and Horde (Shack) and Horde (PC version)
Note that when you close your terminal, the server will go down. See the "supervisors" section below for how to prevent this.
Auto-updating the server
Assuming you have followed this guide and used the default paths, users, and install instructions, you can paste the following into your terminal to auto-update your Pavlov server:
cat << 'EOF' > $HOME/pavlov_daily_update_and_restart.sh
#!/bin/bash

USER="steam"
SERVICENAME="pavlovserver.service"
INSTALLDIRNAME="pavlovserver"
USERHOME="/home/$USER"

echo -e "Beginning Pavlov VR update run on $(date)\n\n"

systemctl stop "$SERVICENAME"

sleep 5
sudo -iu "$USER" "$USERHOME/Steam/steamcmd.sh" +login anonymous +force_install_dir "$USERHOME/$INSTALLDIRNAME" +app_update 622970 +exit
sudo -iu "$USER" "$USERHOME/Steam/steamcmd.sh" +login anonymous +app_update 1007 +quit
sudo -iu "$USER" cp "$USERHOME/Steam/steamapps/common/Steamworks SDK Redist/linux64/steamclient.so" "$USERHOME/.steam/sdk64/steamclient.so"
sudo -iu "$USER" cp "$USERHOME/Steam/steamapps/common/Steamworks SDK Redist/linux64/steamclient.so" "$USERHOME/pavlovserver/Pavlov/Binaries/Linux/steamclient.so"

systemctl start "$SERVICENAME"

echo -e "Ending Pavlov VR update run on $(date)\n\n"

EOF

chmod +x $HOME/pavlov_daily_update_and_restart.sh
mkdir $HOME/pavlov_update_logs && touch $HOME/pavlov_update_logs/pavlov_daily_update_and_restart.sh.log
CRONLINE="00 2 * * * $HOME/pavlov_daily_update_and_restart.sh >>$HOME/pavlov_update_logs/pavlov_daily_update_and_restart.sh.log 2>&1"
(sudo crontab -u root -l; echo "$CRONLINE" ) | sudo crontab -u root -
unset CRONLINE
These commands will:
1. Create a shell script in the "steam" user's home directory that automatically stops the Pavlov server, pulls any updates via steam, pull updates to the Steamworks SDK Redist, and copies the latest version of steamclient.so to the Pavlov server directory
2. Make the shell script executable
3. Create a new directory called "pavlov_update_logs" in the "steam" user's directory, and create a logfile inside that directory called "pavlov_daily_update_and_restart.sh.log". You can check this logfile to see the output of the Pavlov and Steam SDK update commands.
4. Create a crontab entry for the root user that runs this shell script automatically every day at 2:00AM local time
If you want to change the time that this script runs, edit the numbers "00 2" in the line that starts with "CRONLINE=". In the example provided, 00 is the minutes column, and 2 is the hour column. For example, if you wanted the server to automatically update and restart at 4:17AM every day, change the line starting with "CRONLINE=" to:
CRONLINE="17 4 * * * $HOME/pavlov_daily_update_and_restart.sh >>$HOME/pavlov_update_logs/pavlov_daily_update_and_restart.sh.log 2>&1"
If the time is PM, use 24-hour time format, e.g. "32 18" for 6:32PM.
Supervising the server using systemd
Running ./PavlovServer.sh in your interactive shell is easy, but the server will shut down when you close your terminal. If you want to run the server in the background, you'll want to run it under a supervisor. There are many options, ranging from the simple (nohup, screen or tmux), to the more robust (supervisord, systemd).
Systemd is running by default on Ubuntu Linux, so we'll use that here.
To run the server as a systemd service, create the file /etc/systemd/system/pavlovserver.service (as root) by typing
sudo nano /etc/systemd/system/pavlovserver.service
Copy contents below into the file and save.
[Unit]
Description=Pavlov VR dedicated server

[Service]
Type=simple
WorkingDirectory=/home/steam/pavlovserver
ExecStart=/home/steam/pavlovserver/PavlovServer.sh

RestartSec=1
Restart=always
User=steam
Group=steam

[Install]
WantedBy = multi-user.target
If you'd like your server to start as competitive without editing the game.ini, change the line "ExecStart=/home/steam/pavlovserver/PavlovServer.sh" to look like this below. Though it's much easier to just use the game.ini to enable competitive instead.
ExecStart=/home/steam/pavlovserver/PavlovServer.sh -COMPETITIVE=1
Change the user or paths as appropriate. After saving the service file, to start, restart, stop, or monitor the server:
sudo systemctl start pavlovserver
sudo systemctl restart pavlovserver
sudo systemctl stop pavlovserver
sudo systemctl status pavlovserver
To view the logs:
sudo journalctl -u pavlovserver
# to live-tail the logs
sudo journalctl -u pavlovserver -f
If you want to run the pavlov server as soon as your server boots (e.g. a VPS you turn on and off), add pavlov as a startup service:
sudo systemctl enable pavlovserver
Advanced Server Administration
Running multiple servers on one host
- Pavlovserver is functionally single threaded (there are multiple threads, but vast majority of work occurs in the primary one). Make sure you have # of pavlovservers + 1 CPU available. More CPUs= more servers. Faster CPU = more players.
- Make multiple server installs by defining a separate install dir for each server.
- Run each server with a unique port. eg: ./PavlovServer.sh -PORT="Desired Port"
- The Server will use the Desired Port and the Port 400 above (Example: You choose 8200 as Port. So Port 8600 will be used as well)
- If you are using RCON, each server will need a unique port defined in RconSettings.txt
- Ensure the ports are forwarded and opened in your firewall
To duplicate directories:
be in the steam home folder
cp -r pavlovserver pavlovserver1
/home/steam/pavlovserver1/PavlovServer.sh -PORT=[Desired Port]
Starting server in competitive mode
Competitive mode will prevent dead teammates from being able to see the match, to prevent ghosting. You can either enable this via Game.ini (described in Game.ini file), or using the -COMPETITIVE=1 parameter.
/home/steam/pavlovserver1/PavlovServer.sh -COMPETITIVE=1
Useful Linux Commands
List files / folders in directory, print current working directory,
ls -la                                    #list files/directories along with authorities and ownership
pwd                                       #print working directory
sudo chown <owner> <file/directory>       #change owner of file/directory.  If root created something and you need to change it to steam
sudo chgrp <group> <file/directory>       #change group of file/directory.
Check if pavlov is running by checking process status. If the only row you see is the grep command, pavlov server is not started.
ps -ef | grep pav
Sample output:
steam      34044       1  0 16:52 ?        00:00:00 /bin/sh /home/steam/pavlovserver/PavlovServer.sh
steam      34066   34044 80 16:52 ?        00:00:04 /home/steam/pavlovserver/Pavlov/Binaries/Linux/PavlovServer
zombies+   34101   34013  0 16:52 pts/0    00:00:00 grep --color=auto pav
Kill a process. Note this command uses 34044, which is a process id from the command output above.
kill -9 34044
Dump the log to the console so you can scroll through it:
cat /home/steam/pavlovserver/Pavlov/Saved/Logs/Pavlov.log
Search the log for a string - replace my_string with case-sensitive string
cat /home/steam/pavlovserver/Pavlov/Saved/Logs/Pavlov.log | grep my_string